


Gifting has never been easier
Perfect if you're short on time or are unable to deliver your gift yourself. Enter your message and select when to send it.

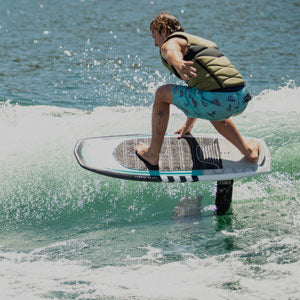
How to Assemble Your Foil: Step-by-Step Guide
Welcome back to another episode of "How To" by Water SK World! Today, we’ll walk you through assembling your foil. Whether you're a beginner or advanced rider, following this guide will ensure your foil is properly set up for the best ride possible. Let’s get started!
Before assembling your foil, you’ll want to take all the components out of the foil bag to ensure nothing is missing. Most foil kits include the following:
The instruction manual is particularly important as different models may have unique assembly steps. Always refer to your manual for model-specific instructions.
Many foil kits come with protective cases for your components. It’s best to keep these on when the foil is not in use, especially during travel, to prevent scratches and other damage.
To begin assembly:
Grease the Bolts
Apply grease to all bolts and inserts to prevent them from seizing up during use. This step is critical for long-term durability and ease of disassembly.
Attach the Mast to the Fuselage
Connect the mast to the fuselage by securing it with bolts. Depending on your model, there may be a locking collar involved, so check your manual to see if your foil has this feature. Grease the locking collar as well before attaching.
Torque the Bolts
Once everything is aligned, torque the bolts snugly, ensuring everything is secure.
With the mast and fuselage attached, you can now move on to the front wing:
Slide the Front Wing Onto the Fuselage
Most models allow you to slide the front wing onto the fuselage. Align the bolt holes.
Secure the Front Wing
Use the provided bolts to attach the wing. Make sure to follow the manufacturer’s instructions for correct placement and bolt alignment.
Tighten the Bolts
Once again, tighten the bolts, ensuring the wing is firmly secured. Double-check all the bolts with your tool to ensure they’re properly torqued.
Next, we’ll move on to the rear wing or stabilizer:
Place the Stabilizer on the Fuselage
The stabilizer will have a flat spot that aligns with the fuselage. Place it on top, ensuring the bolts fit snugly into the pre-drilled holes.
Add Shims (Optional)
Some foil setups allow for shims, which are small inserts that adjust the angle of the stabilizer. Shims can make the foil more or less responsive. However, if you’re a beginner, it’s best to leave the shims out for a more stable ride.
Tighten the Bolts
After placing the stabilizer, tighten the bolts, ensuring everything is torqued properly.
Now that your foil is fully assembled, it’s time to attach it to your board:
Locate the Slide Tracks
Most foil boards have slide tracks that allow you to adjust the position of the mast. Sliding the mast toward the back of the board provides less lift, which is ideal for beginners. Sliding it forward gives more lift, suitable for advanced riders.
Insert the Keepers
Loosen the bolts on the mast base and insert the keepers into the board’s tracks. Once inserted, align the mast and slide it to the desired position.
Tighten the Bolts
Once the mast is in place, tighten the bolts in the track system to lock the mast into the correct position.
Double-Check Your Work
Before hitting the water, ensure all bolts are tight and secure. Loose bolts can lead to performance issues or damage.
Disassembly for Transport
If you need to transport your foil, you can either take it apart completely or disassemble the lower portion (mast, fuselage, wings) from the board. Remember to use your protective covers during transport to avoid damage.
Sign up to our mailing list so you don't miss out on exclusive deals, latest product drops and more.
Get the chance to Win Back your order!
