









Gifting has never been easier
Perfect if you're short on time or are unable to deliver your gift yourself. Enter your message and select when to send it.

Short answer: Start at the handle and work up the rope. At every set of loops there are two you could use — take the one that is part of the rope running back to the handle. That puts the load on the bite of the rope rather than pulling directly on the knot, which is what keeps it strong and safe. Put that loop over the pylon and lay the excess rope off to the side. The same rule covers knotted lines, slide loops, Spectra and Dyneema.
Read this bit before you rig anything. Using the wrong loop can damage or break a rope, and it may injure your rider or your boat crew. A rider or skier puts an enormous amount of load through the tow point. It is worth watching the video more than once until the loop selection is obvious to you.
There are plenty of reasons to change rope length over a season — competition slalom, shortening up to a narrower part of the wake while you are learning wake jumps, or moving to a better part of the wake for more advanced tricks. Any rope designed to be shortened comes with multiple loops to let you do it. The only question is which loop goes on the tow point, and Reuben answers it in the video.
Reuben on selecting the right loop and shortening every type of rope — 5 minutes 1 second.
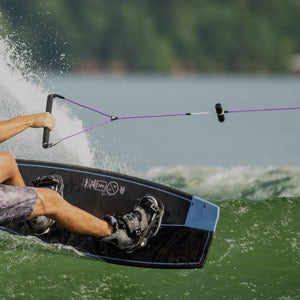
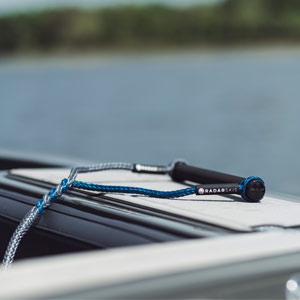
Look at how a handle attaches. The loop goes over the tow point and the load sits on the bite of the rope — the curved part of the loop itself — rather than pulling straight onto the knot. That is the strong, safe configuration, and it is the thing you are reproducing every time you shorten the line.
So at each set of loops, the correct one is the loop that is part of the rope going to the handle. Get in the habit of checking where the rope leaves the loop you have chosen: it should head off towards the rider.
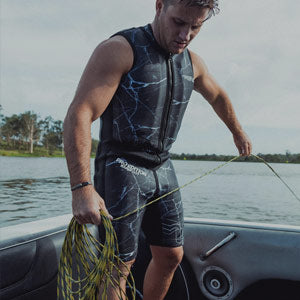
The rider holding the handle is your reference point for everything that follows. Look at how the handle's own loop sits on a tow point: the load pulls on the bite of the rope, not on the knot. Every loop you choose further up the rope has to do the same thing.
Take the rope off the pylon so you can work along it freely.
Move along the rope from the handle end until you reach a set of loops at the length you want.
At every set of loops there are two candidates. Choose the one that continues on towards the handle — the one with the rider's side of the rope running out of it. That puts the load on the bite. Take the wrong one and the pull lands on the knot.
Want more length? Carry on up the rope to the next set of loops and apply exactly the same test: take the loop coming from the handle.
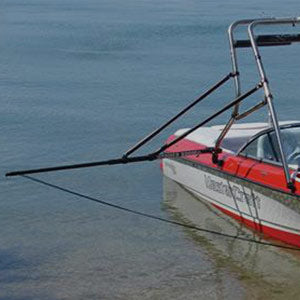
Place your chosen loop over the pylon or tow point, then lay the excess rope neatly off to the side so it is clear of the rider and out of the way of the crew.
Come down the rope towards the rider to the length you want, push the two loops together to create a single loop, and put that over the pylon. Check the rope leaving that loop is heading back to the rider.
Common on older ropes. Use the loop backing onto the knot, so the knot cannot unsplice itself under load. The rope still needs to run back to the rider.
Slides out to open, as the name suggests. Slide it open, place it over the ski pylon and pull tight to cinch it, rope running to the rider. To shorten a slide loop rope further, unslide the loop going back to the rider.
Treated the same as a knotted line: two loops, push them together, take the loop going to the rider.
Use the loop backing onto the knot closest to the rider.
From the shop — rope care. A little care makes a rope last a lot longer. Never trail a rope behind the boat when you are not towing — it is a hazard and it wears the rope fast. Rinse with fresh water after salt water, store it out of direct sun, and check it before every session. Frayed sections with filaments facing opposing directions mean the rope has been scuffed by a ski or board edge or a bad knot; filaments all facing one direction at the end of a skein is normal, and that section is actually stronger.
The loop that is part of the rope running back to the handle. At any set of loops there are two options, and only one of them puts the load on the bite of the rope rather than pulling directly on the knot.
The load ends up on the knot instead of the bite. That can damage or break the rope, and a rope that lets go under load can injure the rider or the people in the boat.
Come down the rope towards the rider until you reach the length you want, push the two loops together to form a single loop, and place that over the pylon. The rope running out of it should be heading back to the rider.
Use the loop backing onto the knot instead, so the knot cannot unsplice itself under load. This is common on older ropes where the knots have pulled up tight over years of use, and it works on both knotted slalom lines and Dyneema.
It is a spliced section that slides open, as the name suggests. Slide it open, place the opened loop over the ski pylon and pull it tight to cinch it in place, with the rope running back to the rider. To shorten further, unslide the loop going back to the rider at the next set.
Same as a knotted line — find your two loops, push them together, and take the loop that is going to the rider.
For competition slalom, or to move to a narrower part of the wake while you are learning wake jumps, or to a better part of the wake for more advanced tricks. Rope length changes where you sit in the wake, which changes what you can do.
Frayed sections where the filaments face opposing directions mean the rope has been scuffed by a ski or board edge or by a bad knot. Filaments all facing one direction at the end of a skein is normal and that section is actually stronger. Check splices and knots before every session.
Not sure whether your rope has had it? Bring it in or send us a photo of the worn section — we would rather check it than have it let go behind the boat.
Waterskiers World — Australia's dedicated towed water sports retailer, family-run for over 20 years from our Brisbane store at 1106 Ipswich Rd, Moorooka, and online. Get in touch.
Sign up for exclusive deals, latest product drops and more, plus get a first-order discount.
