








Gifting has never been easier
Perfect if you're short on time or are unable to deliver your gift yourself. Enter your message and select when to send it.

Les on wakeboard starts behind a boat. Everything below follows the video.
The short answer. A wakeboard start is a ride, not a fight. Get compact on the bank first — knees bent past 90 degrees, arms relaxed out in front, leading knee inside the leading arm so the handle sits closer to your front foot. In the water show only a little of the board above the surface, look 45 degrees out to your leading side, and go with it. No standing, no pulling.
You stand when the pull on the rope gets lighter — that is the board taking your weight. Then stand slowly. Do not pull on the rope; do not push the board away.
Les frames the whole lesson around one idea: get the beginner relaxed and on the correct equipment. Almost everything that goes wrong with a first wakeboard start traces back to one of those two.
The worked example below is a left-foot-forward start, because that is how Les teaches it. If you ride right foot forward, mirror everything — there is a section on that near the end.
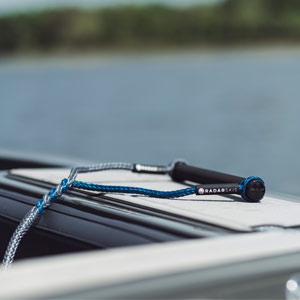
Assuming your sunshirt, sunscreen and wet pants or board shorts are sorted, the gear that matters for the start is a board, a rope and a handle.
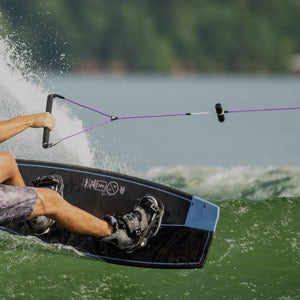
Les is brief about this one. Just a short V. Keep it simple.
Poly rope has a fair bit of stretch in it. If you can use Spectra or Dyneema instead, you will get a more consistent pull from the boat — which matters more than usual when the person on the end is learning to read that pull.
More on rope and handle types in the breakdown on wakeboard ropes and handles.
You do not want a board that is too small. As a beginner, surface area is key: the bigger the board, the more lift, and the more progressive the start will be.
But there is a limit in the other direction. Go too big and the foot placement ends up too far apart, which will not suit smaller kids.
Rather than guess, run the numbers on the wakeboard size guide. Everything below assumes the board is the right size.
This is deliberate, not lazy. A symmetrical setup lets you teach a beginner to ride either left foot or right foot forward. Les wants them to get a couple of starts one way, then switch and come up with the other foot leading. Learning both early is much harder to add later.
Boot mounting, hardware and stance width are covered in how to set up your wakeboard.
Sit the beginner down on the bank with their feet out in front, roughly the correct distance apart. Then build the position:
Coming up left foot forward:
Why the mismatched arms matter. That combination positions the handle slightly closer to your leading foot. So when the rope pulls the board and pulls your body, it is pulling you slightly to that left side — the direction you actually want to go.
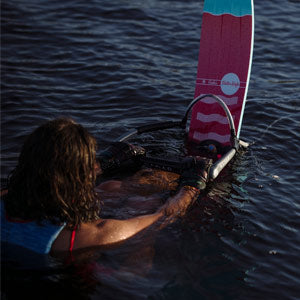
The board wants to be at a slight angle, with only a little of it up out of the water and visible above the waterline. That is all you need.
Left foot forward, that means the left end of the board is the end sitting slightly proud of the surface, and your arms and the handle are already biased across to that side before the boat moves.
Left foot forward means you are going to move out to your left. So your eyes should be looking out to the left — about 45 degrees is fine.
When the handle pulls:
You just have to go for the ride with it. No standing, no pulling — just staying flat on your feet, arms biased towards that leading knee, eyes out to the left.
You stand when the pull on the rope is less. That lighter feeling means the board has lifted the bulk of your body out of the water and is now gliding.
Then stand very slowly and gently:
If the board is skating out from under you, the fix on the next attempt is small: lift your toes — as if you are trying to lift them away from the base of the boot.
That is all the leverage you need to put a little bit of edge into the board, which helps it track and move out to the left side and gives you that stable feeling.
What not to do instead. Do not pull your arms in. Leave your arms out. Think left hip, left ankle bone, left shoulder all helping to drive you out to that left side.
The mirror image. Everything is simply reversed:
Start this way and your starts will be progressive, and your boat driver will have a much easier job accommodating your moves on the water.
The reverse is also true, and it is the reason to slow down: if you move quick, you get a quick reaction. It is much harder for a driver to accommodate a rider producing very quick results and quick actions.
Slow down. Be very deliberate, very conscious. Let your driver help you.
Get compact: knees bent past 90 degrees, arms relaxed out in front, leading knee inside the leading arm and the trailing elbow inside the trailing knee so the handle sits closer to your front foot. Show only a little of the board above the water, look about 45 degrees out to your leading side, and go for the ride without standing or pulling. Stand slowly once the pull on the rope gets lighter.
Not a small one. Surface area is key for learning - the bigger the board, the more lift and the more progressive the start. The limit is that a board which is too big puts the feet too far apart, which does not suit smaller kids. Use the wakeboard size guide rather than guessing.
A short V handle, kept simple. For the rope, poly has a fair bit of stretch in it; Spectra or Dyneema gives a more consistent pull from the boat, which is easier to learn against.
Symmetrical - the same angle out on both feet, and both boots equidistant from the ends of the board. Beginner boards are quite symmetrical, and a symmetrical setup lets the rider learn starts both left foot forward and right foot forward.
Only a little of it, with the board at a slight angle. You do not need the whole board out of the water, and you do not want to bury it either.
Out towards your leading side, about 45 degrees. Left foot forward means looking out to the left, because that is the direction the board is going to move as it comes up.
When the pull on the rope gets lighter. That means the board has lifted the bulk of your body out of the water and is gliding. Then stand very slowly and gently - do not pull on the rope and do not push the board away.
The board has no edge in the water. Next attempt, lift your toes as if lifting them away from the base of the boot. That small amount of leverage adds enough edge for the board to track and move out to your leading side. Do not pull your arms in - leave them out.
Both. Les has beginners get a couple of starts one way, then switch and come up with the other foot leading. A symmetrical boot setup is what makes that possible.
Because if you move quick, you get a quick reaction, and it is much harder for a driver to accommodate a rider producing very quick results. Progressive starts give the driver time to help you.
Get the board right first: the wakeboard size guide, the wakeboard range, and the breakdown on picking a wakeboard if you want to understand rocker, channels and shape before you buy. Boot mounting and stance are in how to set up your wakeboard.
For the pull: wake ropes and handles, and the breakdown on wakeboard ropes and handles. Everyone in the water needs a properly fitted life jacket — here is how to check the fit. More lessons in the how-to guides.
Setting a first board up for a kid and not sure what suits them? Come into the shop at Moorooka in Brisbane, give us a call or send us an email — tell us their height, weight and age and we will sort it out.
Presented by Les at Waterskiers World — Australia's dedicated towed water sports retailer, family-run for over 20 years from our Brisbane store and online. Talk to our team.
Sign up for exclusive deals, latest product drops and more, plus get a first-order discount.
