


Gifting has never been easier
Perfect if you're short on time or are unable to deliver your gift yourself. Enter your message and select when to send it.

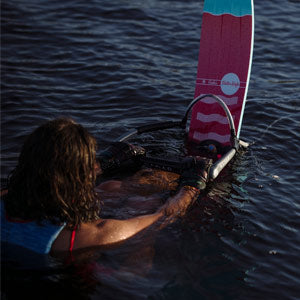
Setting up your trick ski correctly is essential for comfort, control, and progression in trick skiing. Whether you’re a beginner or looking to refine your setup, this guide will walk you through every step to get your trick ski ready for the water.
Before you start, gather the following:
Your trick ski
Front binding (boot)
Rear toe plate
Mounting screws
Tape measure
Screwdriver
Electrical tape or masking tape
The electrical tape is a handy tool for marking the center of your trick ski. This reference point will help you position your front boot accurately.
The first step is to locate the midpoint of your trick ski. Use electrical tape to mark the center line. For beginners, your ankle bone should be positioned roughly at this center line or just slightly forward. This ensures balance and control as you start your trick skiing journey.
With the center line marked, place your foot in the front boot to determine where your ankle bone aligns. In this example, the ankle sits about 1.5 cm back from the center mark. Once you’ve identified the right location, match it to a hole on the ski and place the boot there. Hand-tighten the screws to secure the position temporarily.
For a left-foot-forward skier (right foot back), place the rear toe plate so your foot is centered across the ski—or slightly closer to the toe side. This positioning provides better leverage and control as you progress. Line up the holes and hand-tighten the screws. Make sure the plate is positioned close to your front boot, with your toes nearer to the edge than your heel. This setup offers long-term benefits for your tricking performance.
Before fully tightening everything, put the ski on a flat surface (a beach towel works well) and step into the boots. Check for comfort and correct alignment. Adjust as necessary.
Once the rear toe plate is in the perfect spot, peel off the self-adhesive backing and press it down onto the ski. This semi-permanent affixation ensures the plate stays in place during your sessions.
Hand-tighten all screws and double-check positioning. Avoid using a power screw gun at this stage—you want to be precise and ensure everything feels right.
Always check that your feet feel comfortable and secure.
Keep your toes slightly closer to the ski’s edge than your heels for better control.
Reassess your setup periodically as you improve and refine your technique.
With your trick ski properly set up, you’re ready to hit the water with confidence and start progressing your trick skiing skills!
Sign up to our mailing list so you don't miss out on exclusive deals, latest product drops and more.
Get the chance to Win Back your order!
